Retrofitting an old iPod Mini
After owning a couple of mp3 players in my youth, I’ve made the jump to an Apple device with an iPod Mini as my music player. Sadly, it’s in no working condition anymore I’m sure it’s possible to replace the entire inside, but it’s more fun to do something else with it. Thus and idea was born that didn’t come into fruition until a couple of days ago when I had some time available.
I previously emptied out the iPod Mini and was left with a carcass of parts. I’ve been collecting parts that could fit together and finally had the time to print a platform that could slide in next to the buttons (which I wanted to keep as original). And I wondered, is it actually retrofitting if you’re thinking of using it for something else? I quickly uploaded a de-auther firmware on the ESP8266 I planned on using… Oh boy.
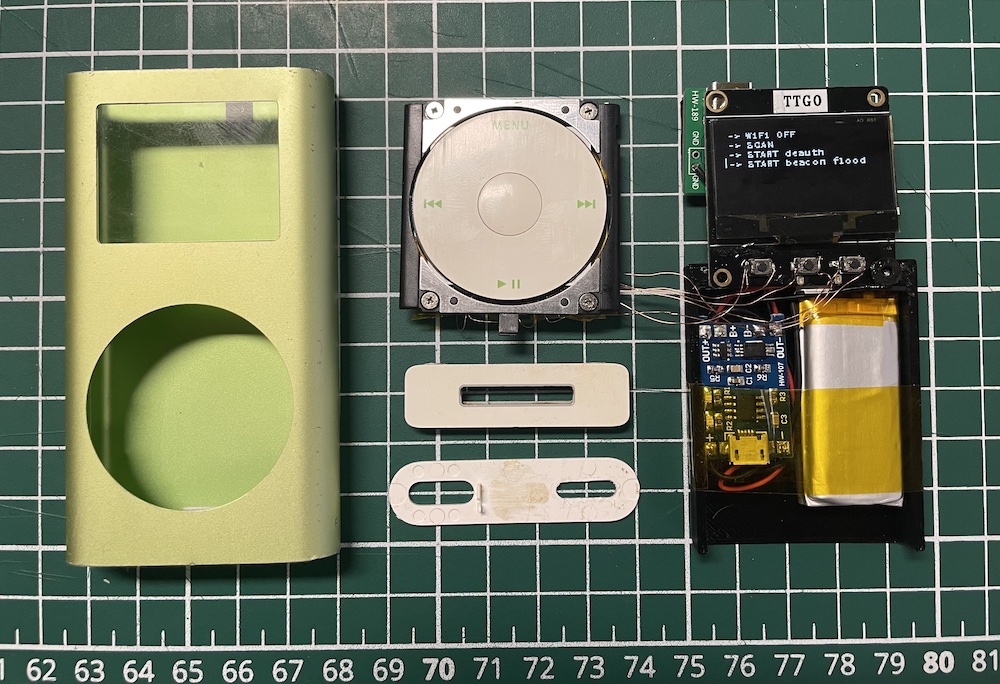
Now I only had to assemble everything while soldering the buttons with thin enemaled wires. This ended up being quite a challenge due to the space that’s available and the layering of the buttons of the clickwheel. Sadly I currently lack the knowledge of hooking up the clickwheel, but if that’s possible in the future, that’s even better! In the end I also decided to remove the on-off button to replace it with the USB-C port that I can use for charging of the battery.
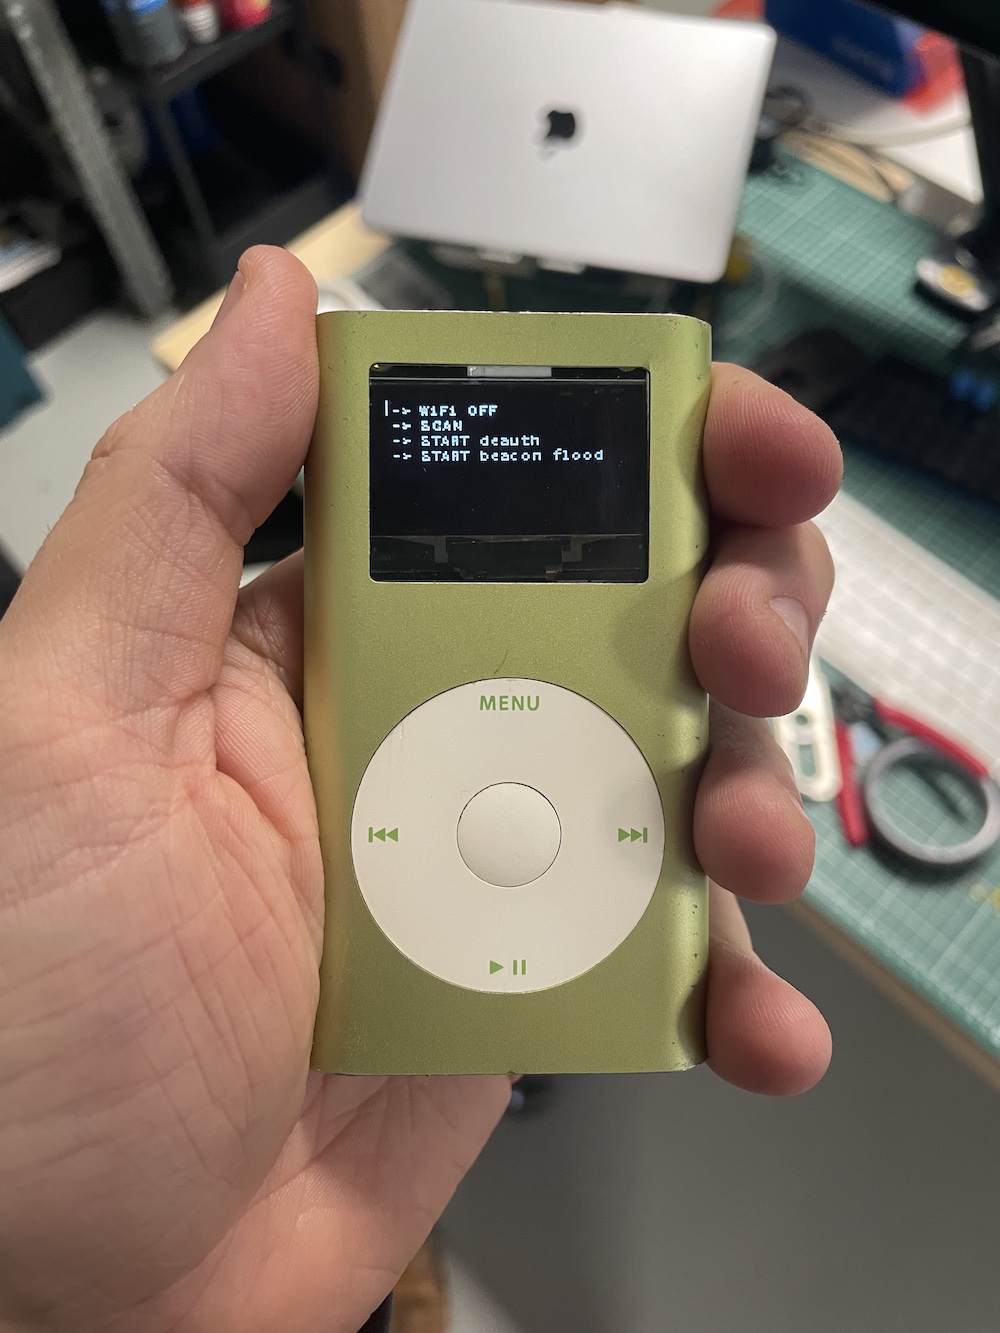
No hand model haha.., Ah well… Now moving into software territory.. Might or might not write a post about it.
The bottom is carefully hidden in the shots, that’s still one part that I need to replace (while I also slot a SD-card in there if possible! Ah well… the ideas are boundless, time however is not). ⏳